Looking for something?

Wednesday, May 20, 2020

Upside Down Tater Totchos with Homemade Guacamole

This is an original recipe from Recipes Are Guidelines! I made this one up myself. It came about one night when I was preparing to make Tater Tot Casserole and realized I only had tater tots, onions, and ground beef. I decided to make nachos instead but realized I didn't have any chips. So I combined the two with nacho ingredients on the bottom, tater tots and cheese on top, and dubbed it Upside Down Tater Totchos. Yum.

If you have a lot of vegetables you need to use up - whether fresh, frozen, or canned - this is a great recipe to dump them into. You'll see me do just that! You'll also see how incredibly simple it is to make your own guacamole. In fact, it only uses two ingredients!


Final Star Rating
Taste: **** (4 stars - I've impressed myself)
Texture: **** (4 stars - I've impressed myself)
Easy to Make: **** (4 stars - I've impressed myself)
Overall Rating: **** (4 stars - I've impressed myself)


Upside Down Tater Totchos with Homemade Guacamole
Serves 8 

Totchos
2 tbsp chili-pepper infused olive oil
1 lb lean ground beef (or any ground meat)
1 cup chopped onion
1 cup chopped bell pepper
1 tbsp garlic powder
2 tbsp Mrs. Dash Southwest Chipotle seasoning
16 oz (2 cups) black bean and corn salsa (or your favorite salsa)
1 (15 oz) can no salt added diced tomatoes
1 cup frozen corn
1 pint halved cherry tomatoes
1 (15 oz) can no salt added beans, drained and rinsed
1 small can chopped olives, drained and rinsed
1 (8 oz) pkg 2% shredded cheese
1 (2lb) bag tater tots
Optional: additional cheese for topping

Homemade Guacamole
3 ripe avocados
1 cup salsa


  1. Preheat oven to 425 degrees F. Spray 11x7 baking pan with cooking spray and set aside. 
  2. To make the totcho base, drizzle flavored olive oil into skillet. Add ground beef, onion, and green pepper. Brown meat over medium-high heat until cooked through. 
  3. Add salsa, garlic powder, and Mrs. Dash. Stir well to combine. Add corn, tomatoes, and cherry tomatoes. Stir again. 
  4. Drain and rinse the beans and olives. Add to skillet and stir gently as skillet will be full. Let simmer on stovetop over medium-low heat for about 10 minutes, stirring occasionally. 
  5. Remove skillet from heat and pour contents into prepared baking dish. Spread evenly into pan. Sprinkle with cheese. 
  6. Add tater tots on top of totchos, and spread tots out into even layer. These are your "chips."
  7. Put into preheated oven for 30-35 minutes or until tots are browned and crispy. 
  8. While the totchos are baking, make your very simple, homemade guacamole: cut avocados in half and use a spoon to scoop out the seed and remove the skin. Put avocado in bowl with 1 cup salsa. Smash avocados and salsa together with a fork, stirring as you go. Cover guacamole and refrigerate until ready to use. 
  9. When totchos have 5 minutes left on timer, remove from oven, and sprinkle with cheese (if desired). Put back in oven to bake and melt cheese for remaining 5 minutes. 
  10. When done baking, let totchos cool on counter for 5-10 minutes. Slice into 8 squares, top with homemade guacamole, and enjoy!

Source: This is an original from Recipes Are Guidelines.

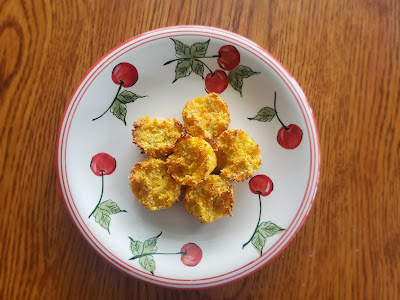
I completely forgot to add the guacamole. 


Notes for Next Time: This is one of those recipes where you can dump any vegetables (fresh, frozen, or canned) you are looking to use up. As you can see, it has a TON of vegetables in my recipe, which makes this a high fiber meal. It's also high fat and high carb. Because of the meat, cheese, AND beans, this is also a protein-loaded meal. Basically, this recipe is high in everything. I'm a dietitian. 

The nice thing about this recipe is the versatility. You can use any kind of meat you have available. Leftover chicken or turkey or even hamburgers can save you a step! You can use any kind of salsa you enjoy eating. As I've mentioned before, black bean and corn salsa is my favorite, and primarily my only salsa. 

Who knew making your own guacamole could be so simple? I am certain I am not the only person to figure out the "cheater's way" for a quick guac, but I'm going to pretend I did. 

Another nice thing about this recipe: you just pour everything into a skillet, stir it around for a bit, then pour everything into a baking dish. Simple! I don't eat this one very often because it makes such a huge quantity, but I look forward to eating it when I do! I hope you do as well. But don't touch these ones because they're mine. 


Check out how I made this recipe and homemade guacamole below 👇

Saturday, May 16, 2020

Baked Avocado Fries

This is another Produce for Kids recipe because I love that website so much. You can find the original Baked Avocado Fries recipe here. Another easy, fun recipe that requires minimal effort. 


Final Star Rating
Flavor: *** (3 stars - edible)
Texture: **** (4 stars - I've impressed myself)
Easy to Make: ***** (5 stars - Delicious Award)
Overall Rating: **** (4 stars - I've impressed myself)

This is a fun alternative to french fries. Not difficult to make at all and really versatile; you can use a multitude of different spices in this, depending on what flavor you're going for. 


Baked Avocado Fries
Serves 4
2 firm, ripe avocados
2 tbsp lemon juice
3 tbsp lime juice
1 cup cornmeal
1/4 tsp lite salt (split into two 1/8 tsp servings)
2 tbsp Mrs. Dash Southwest Chipotle seasoning (split into two 1 tbsp servings)
  1. Preheat oven to 425°F.
  2. Combine lemon & lime juice in small bowl, stir in 1 tbsp Mrs. Dash seasoning and 1/8 tsp salt. In a separate bowl, mix cornmeal 1/8 tsp. salt and 1 tbsp Mrs. Dash seasoning.
  3. Dip avocados into juice, then press into cornmeal mixture.
  4. Line baking sheet with parchment, lay avocados flat in a single layer, and bake 12-15 minutes, or until golden brown.
Source: Modified, gluten-free recipe provided by Recipes Are Guidelines. To view the original recipe, please visit Produce For Kids


Notes for Next Time: As I said and as you can now see, this is a really simple recipe. Two easy ones in a row! Both side dishes or snacks that can be made in less than 30 minutes.  

I felt the cornmeal was a little overpowering in this recipe, so I will likely cut it back to around 2/3 cup, if I do this one again. The Mrs. Dash added great flavor, but because of the Hispanic flavor this did not dip well with the standard ketchup or ranch dressing. It tasted great with salsa, though. I'm a dipper. I need something to dip. 

That's honestly all I have to say about this one. It was fun and easy and even reheated well on days 2 and 3. I really can't say I have a lot of complaints, which is nice! Maybe I'm finally getting better at this whole cooking thing. 


Watch me make this recipe below 👇

Tuesday, May 12, 2020

Cheesy Cauliflower Tots


The original recipe for Cheesy Cauliflower Tots can be found on Produce for Kids. This is a good, simple recipe. Quick and easy to make. Win!

This recipe came about because I despise - with a passion - cauliflower. I don't like the taste, the smell, the texture. I don't like anything about it. While doing a webinar on "pandemic eating" for a local company, I was challenged to continue trying cauliflower until I found a way I enjoyed it. And, honestly, my first try did pretty well. I would make, and eat, these again. Final star rating - pretty high for cauliflower - is below.


Final Star Ratings
Flavor: **** (4 stars - I've impressed myself)
Texture: **** (4 stars - I've impressed myself)
Easy to Make: ***** (5 stars - Delicious Award)
Overall Rating: ****.3 (4.3 stars - I've impressed myself)

Check out this very simple recipe below!


Cheesy Cauliflower Tots
Serves 4
1 (10 oz) bag riced cauliflower
1 large egg
1 cup 2% shredded colby-jack cheese
1 tbsp Mrs. Dash garlic & herb seasoning

close up of cauliflower tot still in the paper muffin liner. It is yellow in color, with a golden brown top. It has texture in it from the cornmeal.
  1. Preheat oven to 400°F. Line mini muffin pan with paper liners and set aside.
  2. Cook cauliflower according to package directions (place entire package in microwave on high for 4 minutes - do not poke or open bag prior to cooking). Let cool. Pour cauliflower onto kitchen towel and squeeze out excess water.
  3. Mix cauliflower, egg, cheese, breadcrumbs, and Mrs. Dash in large bowl. Scoop evenly into prepared muffin tin.
  4. Bake 20-25 minutes, or until golden brown.
rows of cauliflower tots cooling on a metal rack. the tots are still wrapped in their paper liner.
They came out so perfect I had to take a million pictures

Notes for Next Time: As  you can see, this was quite a simple recipe. Except for the cauliflower, I kept all the same proportions from the original recipe. I didn't realize the cauliflower I ordered was actually quite a bit smaller than what the recipe called for. This honestly didn't hurt the recipe at all. Nicely, the frozen riced cauliflower had a little bit of garlic sprinkled on it already which made the kitchen smell great and helped hide the cauliflower smell (except for inside my microwave, which required much scrubbing to rid it of the farty cauliflower stench).

Because I had about 6 oz less of cauliflower than the original recipe, I could have cut back slightly on the cornmeal and cheese. Because I had so much of both, I ended up with a very dry mixture requiring a second egg. That held the mixture together perfectly. And, in the end, it was quite good. 

If I have the same 10 oz package of cauliflower rice next time, I will cutback the cornmeal to 1/3 cup and the cheese to 2/3 cup. Between both of those adjustments, I can stick with just one egg and reduce the overall calories/carbohydrates in the recipe. 

I had a cauliflower success on my first try. Yay me! Watch the video to see how easy it was to make. 

oak kitchen table with small ceramic plate painted with cherries. On the plate are 5 round cauliflower tots that resemble tiny muffins.
So cuuuuuuute

Saturday, May 2, 2020

Skillet Apple Pancakes

The original recipe for today's post comes from Produce For Kids - one of my favorite places to go for simple, delicious recipes. I tried out a modified version of their Upside Down Apple Skillet Pancakes. I made just a couple of rookie mistakes, which caused this one to lose a couple stars. Definitely won't be repeated though. Overall, it's a great one to try for breakfast or brunch one weekend.


Final Star Ratings
Taste: **** (4 stars - I've impressed myself)
Texture: ***** (5 stars, Delicious Award)
Easy to Make: *** (3 stars - meh)
Overall Rating: **** (4 stars - I've impressed myself)


**Please note: The modified version of this recipe contain sugar alcohols coming from the sugar-free pancake syrup. Some people experience stomach discomfort and GI distress when consuming sugar alcohols. If this happens to you, you can substitute regular syrup and add to recipe in 1-2 tbsp increments to achieve desired sweetness.**


Skillet Apple Pancakes
Serves 4

ingredients for recipe include skim milk, margarine, gluten free pancake mix, sugar free pancake syrup, 1 egg, cinnamon, and 2 apples2 Honeycrisp apples (or whatever kind you have lying around)
1/4 cup sugar-free pancake syrup
2 tbsp Smart Balance light reduced-calorie margarine
2 tsp cinnamon
1 cup Bisquick gluten free pancake mix
1 cup skim milk
1 egg
Additional syrup and cinnamon for topping, to taste


  1. Add apples, syrup, butter, and cinnamon to skillet. Turn stovetop to medium heat and cook until syrup is bubbly and apples are soft. About 3-5 minutes, depending on thickness of apples. 
  2. In a separate bowl, whisk together pancake mix, milk, and egg until smooth. Pour over top of apples and smooth mixture out to completely cover apples. 
  3. Let cook on stovetop until pancakes are partially set. Carefully flip over and continue to cook until pancakes are completely set and lightly browned. 
  4. Dish onto plate and top with additional cinnamon and syrup. Enjoy!
photo of crumbled pancakes and apples topped with syrup


Notes for Next Time: As you can see, this is a very simple recipe. Immediately after pouring the pancake mix onto the apples, I realized I had no idea how I was going to flip it and keep the whole thing intact. Basically, I couldn't.....so I was disappointed to have to break it up and end up with an ugly broken jumble of pancakes. 

Why did I choose to make the entire thing on the stovetop? Because I have no oven-safe pans. All of my skillets have a squishy plastic handle, preventing me from putting them anywhere but a stovetop. Soon after ruining my pretty pancake by having to flip it, I realized there was a very, very simple solution to all of this: I could have just cooked the apples, then put them in an oven-safe baking dish and poured the pancakes on top, then placed them in the oven. But, I never think of these things when it's convenient. 

If you want to further simplify this recipe, you can use frozen chopped apple slices or dried apple slices. That can save you one step. Remember, dried apples have concentrated sweetness, so you will more than likely need to decrease the amount of syrup you use. Frozen apples will be chopped thicker than what I used. If you decide to use frozen, the apples will take longer to soften, so add another 2-3 minutes to total cooking time. 

My only complaint about this recipe is the super sweetness. I felt the sugar alcohols were too sweet, so I'll need to make sure to cut back on how much I use next time. Maybe I just won't use any as a topper. Outside of that, though, this was an easy and tasty recipe. The mistakes were all mine, and I think this is definitely something I'm going to try again - maybe with pears next time!

overhead photo of  a wooden table with white plate decorated with painted cherries. on the plate is crumbled pancakes with cinnamon apples, with syrup poured over the top


Check out the video to see me realize my mistakes as they happen.